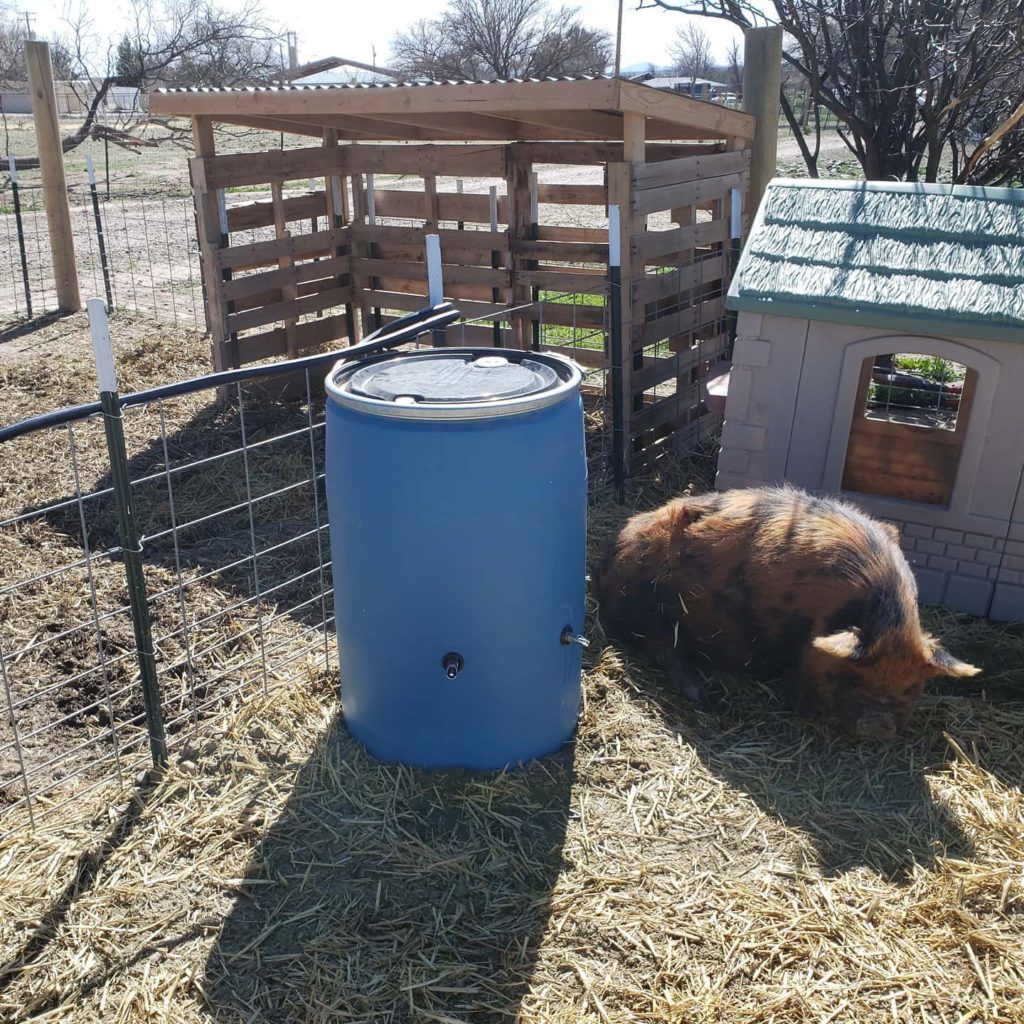
Making sure all the pigs have fresh water daily can be pretty tough when you are in a rush. After doing some research, I combined multiple ideas into an overall useful watering system without breaking the bank. Plus, adding a hose and float valve helps keeping the system filled with water, which helps during cold weather, and saves time during chores.
Tools needed:
Drill
1/2″ Drill Bit Hole Saw
Two large Adjustable wrenches
Marker
Tape measure
Items needed:
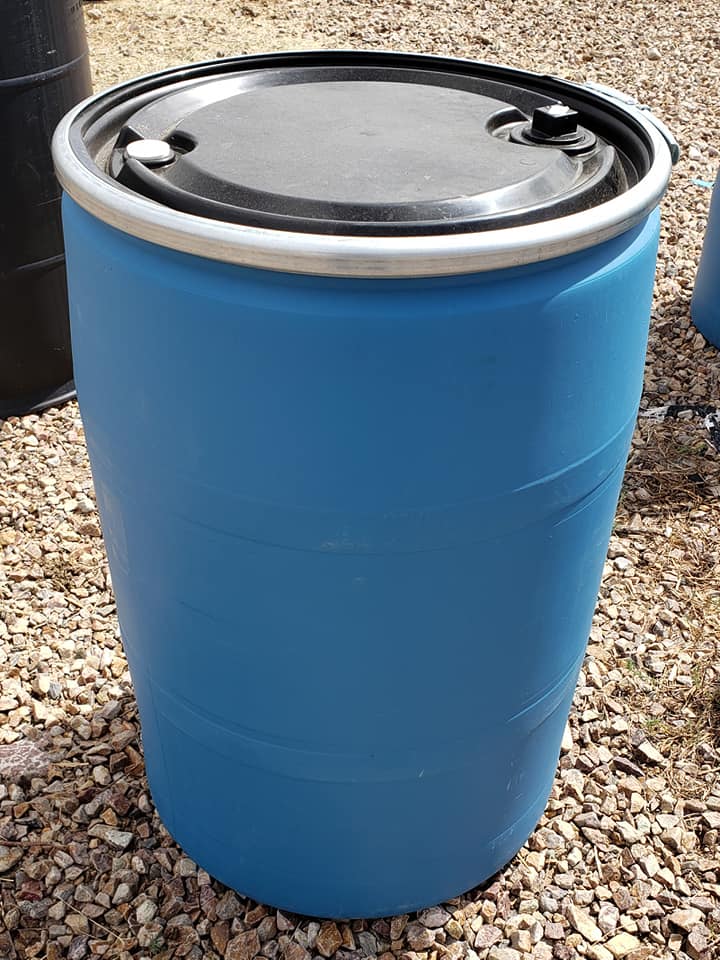
50 or 55 gallon plastic barrel with lid
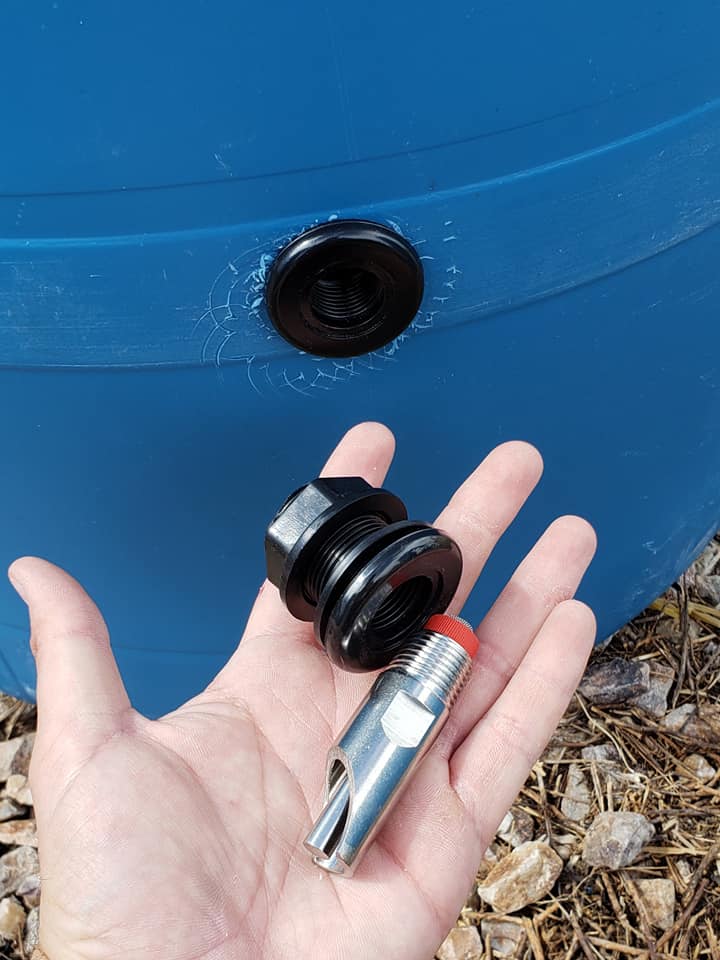
Three – 1/2-Inch Double Threaded Bulkheads
Three – 1/2″ Automatic Pig Nipples
Teflon tape
1/2″ Float valve
Garden Hose 3/4 to 1/2 NPT Fitting Adapter
Float (plastic or metal)
Float arm
Heavy duty garden hose
55 Gallon Plastic barrel with lid
Step 1 – Mark the placement of the bulkhead adapters
Using your marker, place a dot approximately 12 inches from the ground. Make additional marks 18 inches apart.
You wan to make sure that weaned piglets can reach the spigot.
I put the marks on the first line of the barrel.
Step 2 – Drill Holes for the Bulkhead Adapters
Using the drill, and the 1/2″ Drill Bit Hole Saw, cut holes were you mark on the barrel.
If you have a hole cutter bit that does not have a center drill bit to help steady the drill, use the reverse setting on the drill, and slowly put pressure on the barrel to cut the hole.
Barrel with holes cut
Step 3 – Add Teflon tape
Wrap the Teflon tape around the threading of the bulkhead adapters, and the nipples.
This will prevent water leaks.
Bulkhead Adapter on the barrel
Step 4 – Adjust the bulkhead adapters
Hand tighten the bulkhead adapter with the gasket on the outside of the barrel.
Use a large adjustable wrench to tighten the bulkhead adapter to were it is snug.
Note: Pictured are just the items used. Make sure you put Teflon tape on before screwing together.
Step 5 – Adjust the Pig Water Nipple
Hand tighten the pig water nipple to the bulkhead adapter.
Use both large adjustable wrenches to tighten the the nipple. Adjust the nipple with the big base down, and the cut facing up.
Pig Water Nipples on Barrel
Step 6 – Cut Hole for the FLoat Valve
Using the drill, and the 1/2″ Drill Bit Hole Saw, cut one hole approximately 4 inches down from the top on the opposite side of the nipples.
I put the hole for the valve opposite from the middle nipple at the top of the barrel. Choose what is best for your setup.
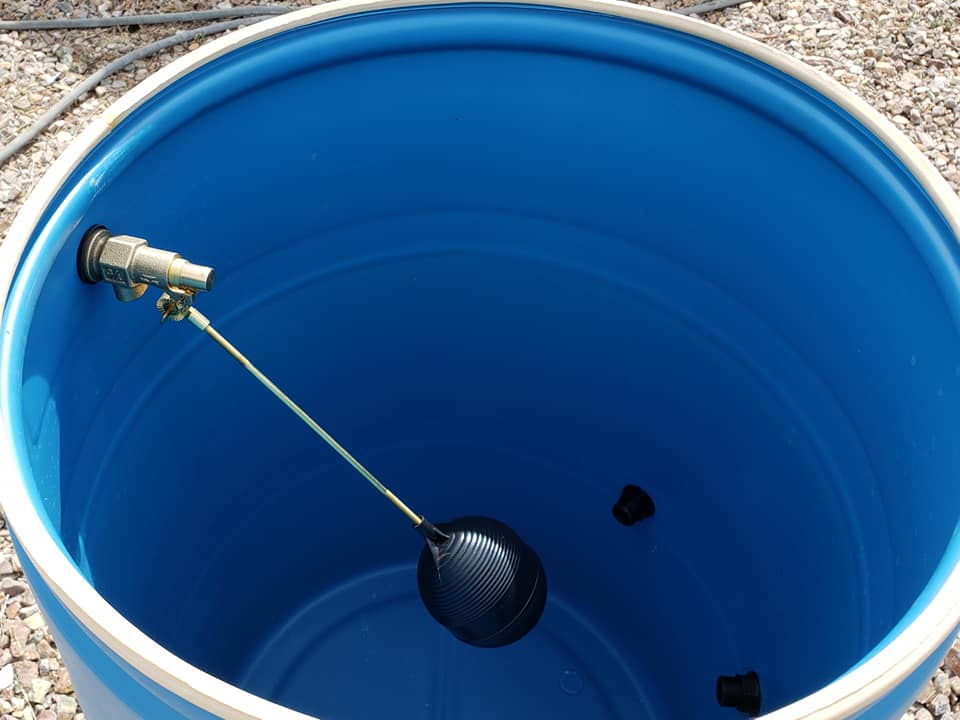
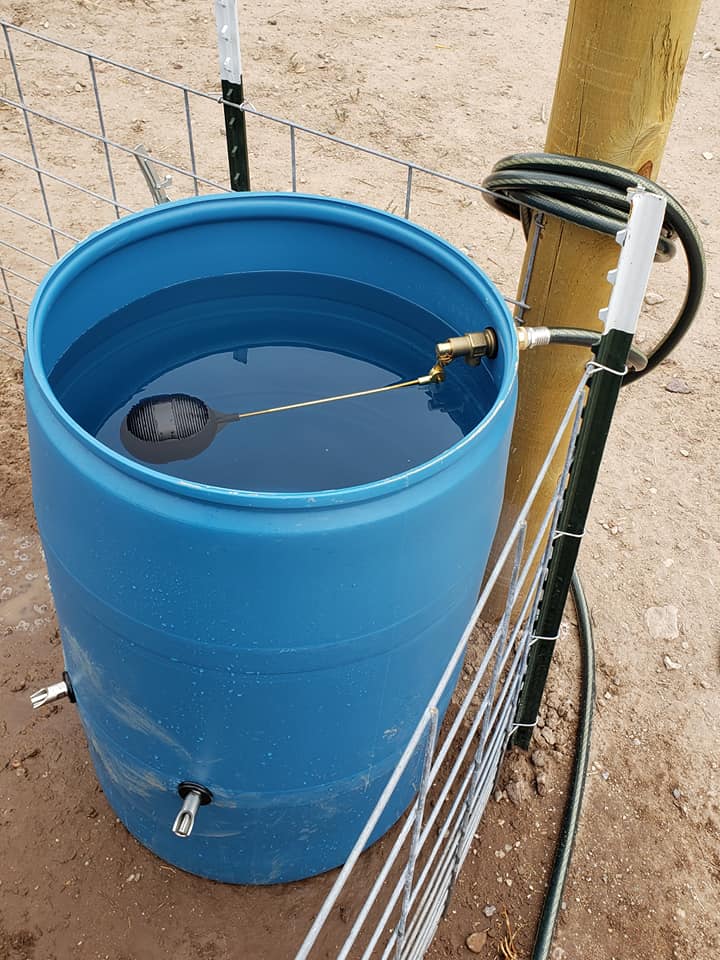
Float Valve Assembly on Pig Water System
Step 7 – Put together the Float valve Assembly
Carefully screw the float to the arm. Screwing to tight can crack the float.
Screw the other end on to the float valve.
Remove nut from the valve.
Wrap tape on the threads of the valve to prevent leaking.
Step 8 – Add the Float Valve and Hose adapter
Screw the float valve assembly to the barrel with the gasket inside the barrel to prevent leaking.
Screw on the hose adapter to the float valve assembly.
Filled Pig Waterer
Step 9 – Connect Hose and Test for Leaks
While the barrel is still empty, pick a place to set it in the pig pen.
Connect hose to the hose adapter.
Fill with water just past the bulkhead adapters.
If it leaks, stop and adjust with wrenches on both sides of the barrel.
Adjust the float so the barrel does not over flow past the float valve assembly.
Let the barrel fill up, and adjust anything else as needed. When complete put the lid back on the barrel.
The pig water system is complete, and will fill itself when needed. Very little maintenance is needed, but check the valve ever now and then. Pigs tend to be a little rough, and can loosen or crack the bulkheads.